Getting eyelash extensions is exciting, but choosing the right ones can feel confusing. Worried you’ll pick the wrong style? We are here to help guide you easily.
For your very first time, classic eyelash extensions are usually the best choice. They add length and some thickness naturally. They look like your own lashes, but better. Talk with your lash technician first.
Choosing your first set of eyelash extensions is a big step. It can change your look and simplify your makeup routine. But you need to make the right choice for a good experience. Let’s explore how to pick the perfect lashes for you.
How to Choose the Best Eyelash Extensions for Beginners?
Feeling overwhelmed by all the lash choices available? Afraid you might select a style that doesn’t suit you? Don’t worry, we make choosing simple for you.
To choose the best beginner eyelash extensions, consider your natural lashes, your eye shape, and the final look you want. Always consult with your lash artist for personalized advice.
Dive Deeper into Your Selection Process
Choosing the right eyelash extensions involves a few key factors. Thinking about these things helps you and your lash tech find the perfect match. It ensures the extensions look great and are safe for your natural lashes.
Consider Your Natural Lashes
Your natural lashes are the foundation. Their health, thickness, length, and curl matter a lot. If your natural lashes are fine or short, very heavy or long extensions might cause damage or fall out too soon. We always suggest starting with extensions that are not much longer or thicker than your natural ones. This gives a subtle enhancement and keeps your own lashes healthy. A good lash tech will assess your natural lashes first. They will recommend options your lashes can safely support. As a manufacturer, we see the difference quality application makes, starting with respecting the natural lash limits.
Match Your Eye Shape
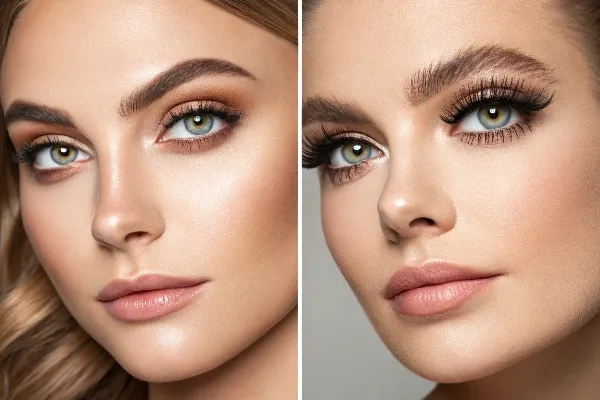
Different lash styles complement different eye shapes. Understanding your eye shape helps choose extensions that enhance your features beautifully.
- Almond Eyes: Most styles work well. You can choose based purely on the look you want.
- Round Eyes: Cat-eye styles, where lashes are longer towards the outer corners, can help elongate the eye.
- Hooded Eyes: Longer lashes in the center of the eye can help open up the eye vertically. Avoid very heavy C or D curls that might touch the eyelid.
- Monolid Eyes: L-curl or L+ curl lashes can provide a nice lift. Shorter to medium lengths often look best.
- Downturned Eyes: A cat-eye shape can lift the outer corners. Focus length and curl towards the outer edge.
- Upturned Eyes: Similar to almond eyes, most styles work. A rounded style can soften the upturned look if desired.
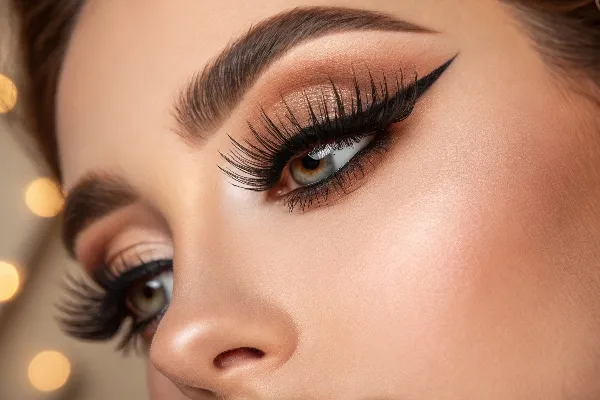
Decide on Your Desired Look
What vibe are you going for? Natural? Noticeable? Glamorous?
- Natural: Classic lashes are your best bet. One extension per natural lash gives a mascara-like effect.
- Subtle Fullness: Light Hybrid lashes (a mix of classic and volume fans) can add a bit more texture and density without being too dramatic.
- Noticeable/Glam: While often not recommended for the very first time, Volume lashes (multiple fine extensions per natural lash) create a much fuller, darker look. Maybe consider this for a future appointment after you’re used to extensions.
Material Matters (Briefly)
Lash extensions are typically made from PBT (Polybutylene Terephthalate), a type of high-quality synthetic fiber. They are often marketed as “Mink,” “Silk,” or “Synthetic.”
- Synthetic (PBT): Most common, holds curl well, available in many finishes (matte, shiny). We use premium PBT for its consistency and safety.
- Faux Mink: Very soft, often matte finish, mimics natural mink fur but is cruelty-free.
- Faux Silk: Usually slightly shinier, lightweight, and soft.
All are good options. The choice often comes down to the finish and the specific brand’s quality. We ensure our Shinning Star lashes are top-grade PBT for safety and performance.
Here’s a simple table to help:
| Factor |
Consideration |
Why It Matters |
Recommendation for Beginners |
| Natural Lashes |
Health, Thickness, Length, Curl |
Support, Longevity, Safety |
Match closely, don’t overburden |
| Eye Shape |
Almond, Round, Hooded, etc. |
Enhances features |
Choose style to complement/balance shape |
| Desired Look |
Natural, Fuller, Glamorous |
Personal preference |
Start natural (Classic), maybe Light Hybrid |
| المواد |
Faux Mink, Faux Silk, Synthetic (PBT) |
Feel, Finish, Curl Retention |
High-quality PBT (most common, reliable) |
Personal Story Placeholder: I remember when my sister first got extensions. She has fine lashes and wanted a super dramatic look immediately. The technician wisely guided her towards a beautiful classic set that enhanced her eyes without looking overwhelming or causing strain. She loved them and later experimented more!
Top Eyelash Extension Styles for First-Time Users?
Confused by terms like Classic, Hybrid, Volume? Just want a clear recommendation for what’s best to start with? Here are the top choices for beginners.
Classic eyelash extensions are the number one recommendation for first-time users. They provide a clean, natural enhancement. Hybrid lashes are a good next step if you desire more fullness.
Dive Deeper into Beginner-Friendly Styles
When you’re new to eyelash extensions, starting simple is usually the best approach. It lets you get used to the look and feel, and the maintenance routine. Let’s look closely at the most suitable styles.
Classic Lashes: The Natural Choice
This is the original eyelash extension technique. One single extension is applied to one single natural lash.
- Look: Very natural, like you have great mascara on. Adds length and some definition.
- Application: Takes about 1.5 to 2 hours for a full set.
- Best For: Beginners, those wanting a subtle enhancement, people with naturally dense lashes who just want more length.
- Pros: Most natural look, lighter weight, generally easier maintenance for beginners.
- Cons: Fullness depends entirely on your natural lash count. If you have sparse lashes, classic might look sparse too.
We, at Shinning Star, produce a wide range of classic lashes in various curls, lengths, and thicknesses, ensuring technicians can create a truly customized natural look for their clients. Quality control is key here, ensuring each lash is perfect for that 1:1 application.
Hybrid Lashes: A Touch of Volume
Hybrid sets mix Classic lashes and Volume fans (fans are multiple very fine extensions joined at the base). Typically, it’s about 50% Classic and 50% Volume fans (usually light fans, like 2D-4D).
- Look: Fuller and more textured than Classic, but still quite natural-looking depending on the ratio and fan size. Wispy looks are often Hybrid.
- Application: Takes slightly longer than Classic, maybe 2 to 2.5 hours.
- Best For: Beginners who want a bit more fullness than Classic offers, people with slightly sparse natural lashes.
- Pros: Offers more fullness and texture, versatile look.
- Cons: Slightly more expensive and requires a bit more careful cleaning due to the fans.
If a client feels Classic is too subtle, a light Hybrid set can be a great first-time option, provided the technician uses appropriate lengths and weights.
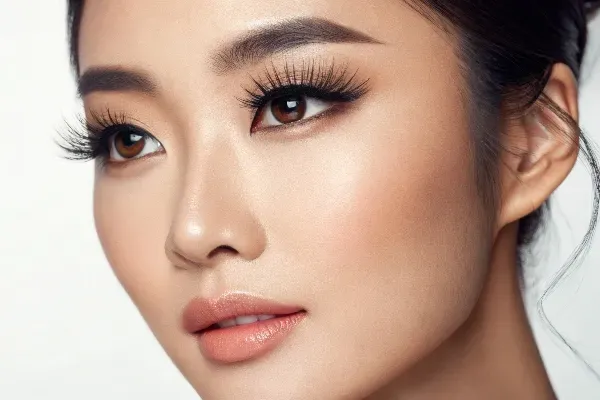
Volume Lashes: Usually Not for Beginners
Volume involves applying fans of multiple (2 to 10+) very fine extensions to each natural lash.
- Look: Dense, full, dramatic, very dark lash line.
- Application: Takes the longest, often 2.5 to 3+ hours.
- Best For: Experienced extension wearers, those wanting a very glamorous look, people with sparse lashes needing significant fullness.
- Pros: Creates maximum fullness.
- Cons: Can feel heavier, requires meticulous aftercare to keep fans fluffy and clean, might be overwhelming visually and sensually for a first-timer, potentially higher risk of stressing natural lashes if not applied correctly or if too heavy.
We strongly recommend starting with Classic or maybe a light Hybrid set. You can always add more drama at your fill appointments if you decide you want more.
Understanding Curl and Length
Besides the style (Classic, Hybrid, Volume), curl and length are crucial.
- Curl: J (slightest), B (gentle), C (most popular, noticeable curl), D (dramatic curl), L/L+ (lift for straight/hooded eyes). For beginners, B or C curls are common starting points.
- Length: Typically ranges from 6mm to 16mm+. For a first set, techs often use varying lengths like 8mm-12mm, keeping it 1-3mm longer than your natural lashes for a believable look.
Here’s a comparison:
| Feature |
رموش كلاسيكية |
Hybrid Lashes |
Volume Lashes (Generally Avoid for First Time) |
| Technique |
1 extension : 1 natural lash |
Mix of Classic & Volume fans |
Multiple fine extensions (fan) : 1 natural lash |
| Look |
Natural, Mascara effect |
Fuller, Textured, Wispy possible |
Dense, Dramatic, Dark lash line |
| Fullness |
Depends on natural lashes |
Medium to Full |
Very Full |
| Best For |
Beginners, Natural look |
Beginners wanting more fullness |
Experienced wearers, Glam look |
| Time |
1.5 – 2 hours |
2 – 2.5 hours |
2.5 – 3+ hours |
| Maintenance |
Easiest |
Moderate |
Requires more care |
Personal Story Placeholder: We supply lashes to many salons, and the feedback is consistent: clients who start with Classics are happiest initially. They adjust easily and feel confident. Those pushed into Volume too soon sometimes feel it’s ‘too much’ at first.
Tips for Maintaining Your Eyelash Extensions as a First-Timer?
Worried your beautiful new lashes will fall out too quickly? Unsure exactly how to care for them day-to-day? Following simple steps makes a huge difference.
Keep new lashes dry for the first 24-48 hours. Clean them daily with lash shampoo. Avoid oil-based products near eyes. Brush gently with a spoolie. Schedule fills every 2-3 weeks.
Dive Deeper into First-Time Lash Care
Getting eyelash extensions is an investment in your look and time (less mascara!). Protecting that investment means proper aftercare. It’s not complicated, but it is important for keeping your lashes looking great and lasting longer, and for maintaining your eye health.
The First 24-48 Hours are Crucial
The adhesive needs time to fully cure and bond. During this initial period:
- Avoid Water: Don’t get your lashes wet. No washing your face directly around the eyes, no swimming, no showers where steam hits your face directly.
- Avoid Steam: Saunas, steamy kitchens, hot yoga are off-limits.
- Avoid Sweat: Try not to engage in heavy exercise that causes excessive sweating.
- Why? Moisture and humidity can weaken the adhesive bond before it’s fully set, leading to poor retention (lashes falling out early).
Daily Cleaning Routine (After 48 hours)
Clean lashes are happy lashes! Buildup of oils, makeup residue, and dead skin cells can break down the adhesive and lead to infections like blepharitis.
- Use a Lash-Specific Cleanser: Regular soaps or face washes can be too harsh or contain oils. Buy a gentle, oil-free lash shampoo recommended by your technician. We know quality cleansers pair best with quality lashes like ours.
- How to Clean: Wet your lashes with cool water. Apply lash shampoo using a soft brush or your fingertip. Gently cleanse along the lash line and through the lashes. Rinse thoroughly with cool water.
- Pat Dry: Use a lint-free towel or paper towel to gently pat dry. Don’t rub. You can also use a small fan on a cool setting.
- Frequency: Clean them once a day, usually in the evening. If you wear eye makeup or sweat a lot, clean them twice.
Brushing is Your Friend
Your technician will give you a clean mascara wand (spoolie).
- Use: Gently brush your lashes once or twice a day, especially after cleansing and drying, or when they look tangled.
- Technique: Close one eye, place the spoolie on top of your lashes, and gently roll it down through the tips. Then, place it underneath and brush upwards. Avoid snagging the base where the bond is.
- Why? Keeps lashes separated, fluffy, and looking neat. Prevents tangling which can cause premature shedding.
Things to Avoid
- Oil-Based Products: Oils break down lash adhesive. Check your makeup remover, cleansers, eye creams, and even foundation. Use oil-free products around the eye area.
- Rubbing or Pulling: Be gentle! Avoid rubbing your eyes or pulling on the extensions. This can pull out both the extension and your natural lash.
- Waterproof Makeup: Especially waterproof mascara or eyeliner. It’s hard to remove without oil-based removers or harsh rubbing. Most people find they don’t need mascara with extensions anyway.
- Mechanical Lash Curlers: These can crimp and break both the extensions and your natural lashes. Extensions come pre-curled.
Sleep Habits
- Try to Sleep on Your Back: Sleeping face-down or directly on your side can crush your lashes against the pillow, causing them to bend or fall out prematurely.
- Use a Silk or Satin Pillowcase: These cause less friction than cotton, so if you do roll onto your side, there’s less chance of snagging.
Regular Fills are Non-Negotiable
Your natural lashes have a growth cycle (usually 60-90 days). They shed naturally, and new ones grow in. Because extensions are attached to your natural lashes, they shed along with them.
- Frequency: Schedule fill appointments every 2-4 weeks (most common is 3 weeks).
- What Happens: During a fill, the technician removes overgrown extensions and applies new extensions to the new lashes that have grown in.
- Why? Keeps your lashes looking full and neat. Prevents gaps and maintains the style.
Here’s a table summarizing the Do’s and Don’ts:
| Action |
Do |
Don’t |
Why |
| First 48 Hrs |
Keep dry, avoid steam/sweat |
Get them wet |
Allows adhesive to cure properly |
| Cleaning |
Use lash shampoo daily (after 48hrs) |
Use oil cleansers, rub hard, skip cleaning |
Prevents buildup, infection, adhesive breakdown |
| Brushing |
Use spoolie gently daily |
Yank or snag the base |
Keeps lashes neat, fluffy, prevents tangles |
| المنتجات |
Use oil-free makeup/skincare near eyes |
Use oil-based products, waterproof mascara |
Oil dissolves adhesive, hard removal damages lashes |
| Habits |
Be gentle, pat dry |
Rub eyes, pull lashes, use mechanical curler |
Prevents premature shedding and damage |
| Sleeping |
Sleep on back, use silk pillowcase |
Sleep face-down on cotton |
Reduces friction and crushing |
| Maintenance |
Get regular fills (2-4 weeks) |
Skip fills or wait too long |
Maintains fullness, removes outgrown lashes, adds new |
Personal Story Placeholder: I always tell my clients, think of lash care like hair care. You wash and brush your hair regularly; lashes need similar gentle attention to stay beautiful! The clients who are diligent always get the best longevity.
What to Expect During Your First Eyelash Extension Appointment?
Feeling a little nervous about what actually happens during the application? Not sure what to expect? Let’s walk through the process so you feel prepared and relaxed.
Expect a consultation first, then prep where your eyes are cleaned and lower lashes secured. You’ll lie down with eyes closed for 1.5-2 hours while extensions are applied. It’s painless and relaxing.
Dive Deeper into the Appointment Experience
Your first eyelash extension appointment should be a comfortable and even relaxing experience. Knowing the steps involved can ease any anxiety you might have. Here’s a breakdown from start to finish, reflecting the quality process we encourage with our Shinning Star products.
The Consultation Phase
This is arguably the most important step, especially for first-timers.
- Discussion: You’ll talk with your lash technician about the look you want (natural, noticeable, etc.). Bring pictures if you have them, but be open to the tech’s expert opinion based on your features.
- Assessment: The tech will examine your natural lashes (length, thickness, health) and your eye shape. This helps determine what styles, lengths, and curls your lashes can safely support and what will look best.
- Recommendation: Based on the discussion and assessment, the tech will recommend a specific lash map (the design using different lengths/curls).
- Questions: This is your time to ask anything! Ask about the process, aftercare, materials used. A good technician will be happy to answer.
- Patch Test (Optional but Recommended): Some salons offer or require a patch test 24-48 hours before, applying a few extensions or adhesive behind the ear to check for allergic reactions.
Preparation Steps
Once you’ve agreed on the plan, the preparation begins.
- Arrive Makeup-Free: Come to your appointment with clean eyes, no mascara, eyeliner, or eyeshadow. Any residue can interfere with the adhesive bond. If you wear contacts, you might be asked to remove them.
- Cleansing: The technician will thoroughly clean your natural lashes and eye area, even if you arrived makeup-free, to remove any oils or debris.
- Securing Lower Lashes: Your lower lashes will be gently secured down using under-eye pads (often cooling gel pads) and sometimes sensitive skin tape. This prevents them from getting stuck to the upper lashes during application. It might feel a little strange at first but shouldn’t be uncomfortable. Your eyes will remain closed from this point until the end.
The Application Process
Now for the main event!
- Get Comfortable: You’ll lie down on a comfortable lash bed or recliner. Many clients find this part very relaxing and even fall asleep.
- Isolation: Using specialized tweezers, the technician will carefully isolate one single natural lash. This is crucial to ensure extensions are applied correctly and don’t stick multiple natural lashes together (which causes damage).
- Application: The technician dips an extension (or a fan for Hybrid/Volume) into a tiny amount of medical-grade adhesive and expertly attaches it to the isolated natural lash, typically about 0.5-1mm away from the eyelid skin (never touching the skin).
- Duration: This process is repeated for each suitable natural lash. A full classic set might involve applying 60-100+ extensions per eye. This takes time, usually 1.5 to 2 hours for a first classic set. Hybrid or Volume takes longer. Patience is key for a quality application.
Sensations During Application
- Touch: You might feel the technician gently working around your eyes, perhaps the light touch of tweezers or the under-eye pads.
- Sound: You might hear faint sounds of the tools or ambient music in the salon.
- Smell: You might notice a slight smell from the adhesive when it’s fresh, but good salons have proper ventilation.
- Pain: The process should be completely painless. If you feel any pinching, burning, or discomfort, tell your technician immediately.
Post-Application Reveal and Aftercare
- Setting/Fanning: Once all extensions are applied, the technician might gently fan your lashes for a minute or two to help cure the adhesive fumes.
- Pad Removal: The under-eye pads and tape are carefully removed.
- The Reveal: You get to open your eyes and see your new lashes in the mirror!
- Aftercare Instructions: Your technician will reiterate the crucial aftercare steps (no water for 24-48 hrs, daily cleaning after that, brushing, avoiding oil, etc.). They should provide you with a spoolie brush. Ask any final questions.
Potential Minor Issues
- Slight Redness: Some people experience mild eye redness immediately after, usually from keeping eyes closed or slight fume sensitivity. It should disappear quickly.
- Initial Feeling: They might feel slightly different or heavier initially, but you’ll get used to them very fast. High-quality lashes like ours are very lightweight. If they feel uncomfortable or poke, contact your technician.
Here’s a summary table of the appointment stages:
| Stage |
What Happens |
Client Experience |
Typical Duration (Classic Set) |
| Consultation |
Discuss goals, assess lashes/eyes, recommend style |
Talking, asking questions |
10-15 minutes |
| Preparation |
Arrive makeup-free, cleanse eyes, apply eye pads |
Eyes cleaned, pads/tape applied, eyes closed |
5-10 minutes |
| Application |
Lie down, tech isolates & applies extensions 1 by 1 |
Relaxing, potentially sleeping, painless |
1.5 – 2 hours |
| Post-Application |
Fanning lashes, remove pads, check results |
Gentle fanning, pads removed, see new lashes |
5 minutes |
| Aftercare |
Receive instructions, spoolie, ask final questions |
Listening, understanding care routine |
5 minutes |
Personal Story Placeholder: I remember my first time; I was so nervous! But the technician explained everything, the bed was comfy, and I actually fell asleep. Waking up and seeing the transformation was amazing. It’s why we focus on providing comfortable, high-quality lashes – the client experience matters from start to finish.
Conclusion
Getting your first eyelash extensions is exciting! Choose classic lashes for a natural start, follow aftercare tips carefully, and enjoy waking up f

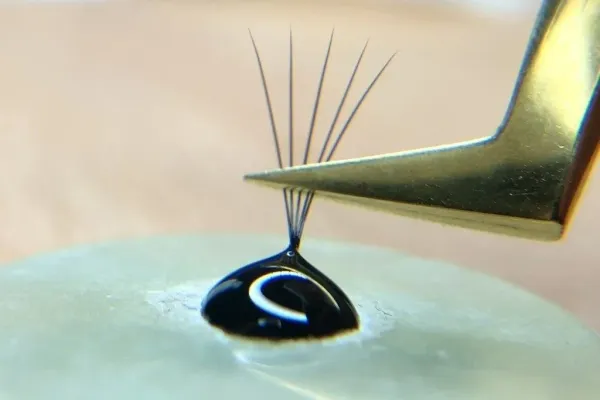
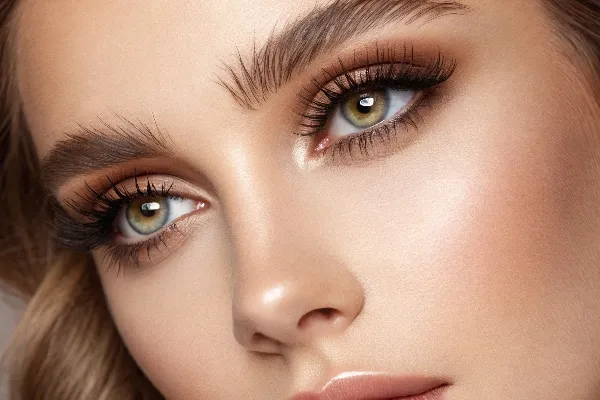
Classic eyelash extensions example for beginners